Guides / Product photography
DIY or professional product photography: which do you need?
DIY product photos are fine for most small New Zealand online stores, as long as the products are simple to shoot and the photos are edited consistently. A professional photographer is worth paying for when the product is hard to photograph, when the photos are the brand, or when you have hundreds of items and no time. There is also a middle option: shoot on your phone and have the photos edited.
- DIY is fine for simple, solid products shot consistently
- Hire a photographer for jewellery, glass, clothing on models and advertising images
- The middle option: shoot on your phone and have the photos edited
What are the three options?
Do it all yourself
- You shoot and you edit
- Costs time and almost no money
Shoot, then hand off the editing
- You take the photos on your phone
- Someone else cuts them out, corrects the colour and matches the backgrounds
Hire a product photographer
- They shoot and retouch
- At their studio or at your premises
Most small stores do not need to pick one for everything. A common split is a photographer for a few hero and lifestyle images, and DIY or edited phone photos for the rest of the catalogue.
What does DIY cost in time and money?
In money, very little: a sheet of white card, a couple of foam boards and perhaps a small tripod. The phone you already own is good enough.
In time, more than people expect. Setting up, shooting six angles of each product, then cropping, correcting and exporting every photo adds up, and the editing usually takes longer than the shooting. Your first batch will be slow and uneven. By the third you will have a routine.
The method is in our guide on how to take product photos with your phone. If you can follow it and keep every product consistent, DIY is a perfectly good answer.
What do you get from a professional photographer?
Three things you cannot easily copy at home.
Lighting control. Studio lights and modifiers can make glass glow, metal look clean and fabric show its texture. A window cannot always do that.
Consistency at volume. A photographer with a fixed setup can shoot a hundred products that all match.
An eye. Styling, composition and knowing which angle sells a product are skills, and they show most in lifestyle and campaign images.
You also get the retouching done, and files delivered at the sizes you need.
How much does professional product photography cost in NZ?
It varies too much to give an honest single figure, and we are not going to invent one. What we can tell you is how it is priced, so you can compare quotes:
- Per image. Common for simple white background catalogue shots. The price per photo usually drops as the number goes up.
- Per hour, half day or day. Common for lifestyle shoots and large or awkward products.
- Per project. A fixed price for a set list of shots.
Then check what is on top: retouching, styling and props, models, studio hire, travel, and the licence to use the images. Ask two or three photographers for a quote on exactly the same shot list. Courier costs matter too if the studio is in Auckland and you are in Gisborne.
Which products are hard to photograph yourself?
- Jewellery. Tiny, reflective and full of detail.
- Glass and clear packaging. It reflects everything and has no colour of its own.
- Polished metal and high-gloss finishes. They are mirrors.
- Clothing on a body. Models, fit, steaming and styling are a job of their own.
- Large items. Furniture needs a space and a background bigger than a sheet of card.
- Food and drink. It has to look fresh, and it does not stay that way for long.
- White products on white. Possible at home, but fiddly. See white background product photos.
If most of your range is on this list, a photographer will probably save you money in the end.
When is DIY good enough?
- The products are solid, matte and a manageable size: ceramics, candles, books, packaged goods, toys, tools, most homeware.
- You have a window and a table you can use for an afternoon.
- The range changes often, so waiting on a shoot for every new item would slow you down.
- You sell on a marketplace such as Trade Me, where a clear, honest photo is what counts.
- You are starting out and need the store open before you can pay for a shoot.
What is the middle option?
Shoot the photos yourself and have them edited. It suits stores where the photos are in focus and reasonably lit, but taken on a bench with clutter behind, each one a bit different.
Editing fixes the things that make DIY photos look amateur: the product is cut out of its background, the colour is corrected, and every item is placed on the same clean background. Here is a real example. It is one photo, before and after.
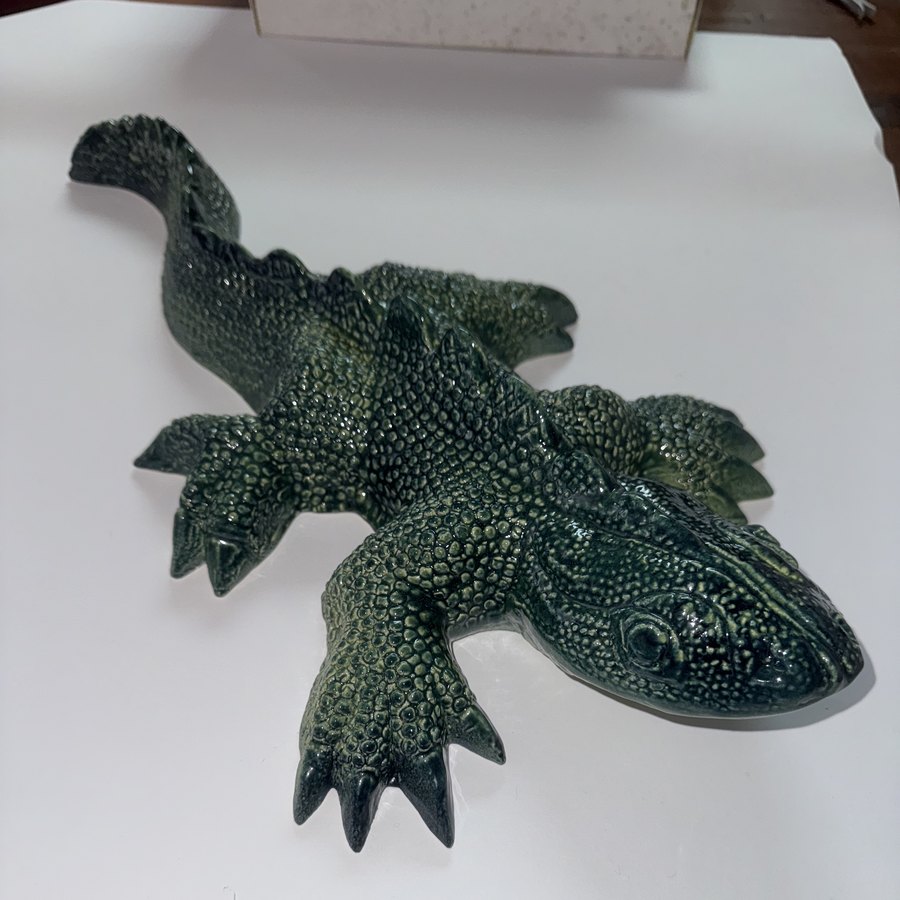
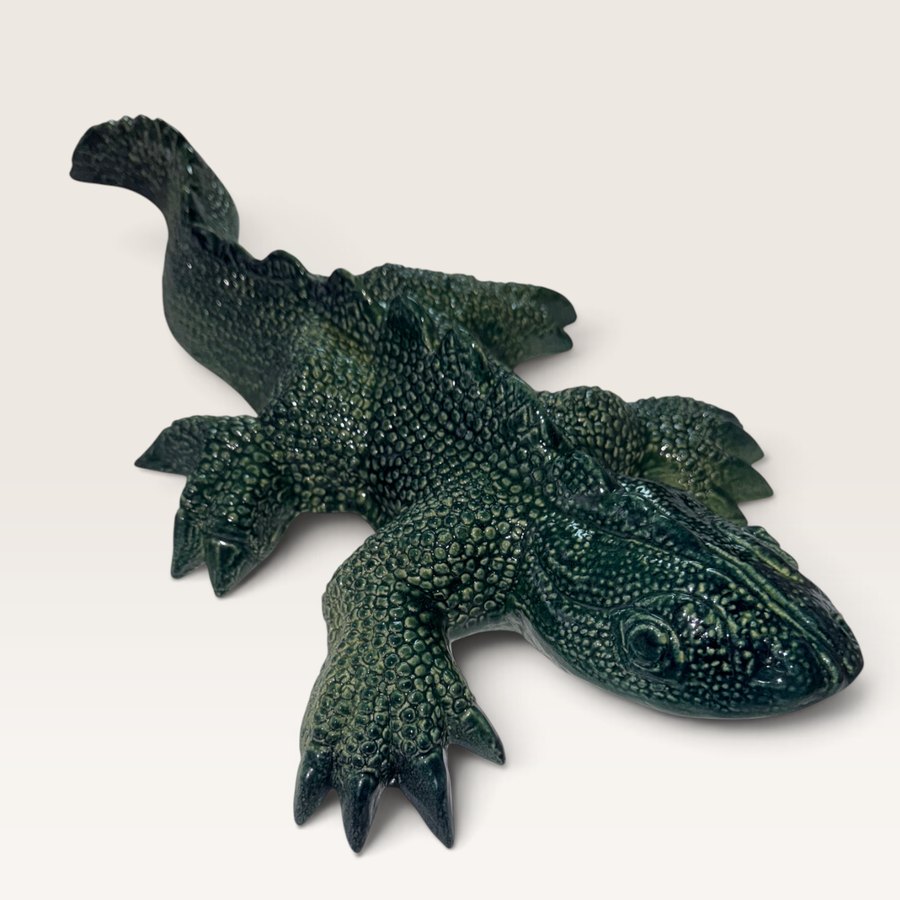
This is the service we offer. Our product photo editing is $5 a photo, and you can send one first to see the result. To be clear about what it is: we edit the photos you take. We do not run a studio or send a photographer.
Editing cannot rescue everything. A blurry photo stays blurry, and a product lit by a ceiling bulb at night will never look as good as one shot by a window. Get the shooting basics right first.
How do I choose between them?
| Your situation | Best fit |
|---|---|
| Simple products, some spare time, tight budget | DIY |
| Decent phone photos, messy or mismatched backgrounds | Shoot yourself, have them edited |
| A large catalogue you have already photographed | Shoot yourself, have them edited |
| Jewellery, glass, polished metal, clothing on models | Professional |
| Photos for advertising, packaging or print | Professional |
| A few hero images plus a big catalogue | Professional for the heroes, edited phone photos for the rest |
Whichever you choose, the main image should meet the basics shopping platforms look for. Google, for example, asks for a clean view of the product filling 75% to 90% of the frame, with no text or borders.
What should I ask a product photographer before booking?
- What is included in the price? Shooting only, or retouching and background removal as well?
- How many final images do I get, and at what size? Check them against our list of product photo sizes for NZ online stores.
- What can I use the photos for? Website and social media only, or also ads, packaging and print? Usage rights are set by the agreement, so get them in writing.
- How long until I get the files?
- What happens if I am not happy with a shot?
- Can I see catalogue work for products like mine? A wedding portfolio tells you little about how they shoot candles.
- Can you match this style again later? New products will need to sit beside the old ones.
Can I mix photos from different sources?
Yes, if they are finished the same way. Customers do not notice that photos came from different cameras. They notice different backgrounds, different crops and different colour. Put every main image on the same background at the same shape, and a store built from a photographer's shots and your own phone photos will still look like one range.
Once the stills are sorted, a short clip can help on a product page or in a social post. We make those from a single photo: see product video.