Guides / Product photography
How to shoot white background product photos
To get a white background product photo, shoot the product on a curved sheet of white paper beside a window, bounce light back into the shadow side with white card, and then lift the background to pure white when you edit. The shooting gets you most of the way there. The edit is what makes the white actually white.
- Curve a sheet of white paper from the wall down onto the table
- Light it from a window on one side, with white card on the other
- Shoot a little brighter than the phone suggests, then lift the background to white in the edit
Why use a white background at all?
Because it gets out of the way. A white background puts all the attention on the product, shows its colour accurately, and makes a page of different products look like one range.
It is also the safest choice across selling platforms. Google's rules for product listings ask for "an unobstructed, clean view of the item for sale" and do not allow borders, promotional text or overlays on the image. A plain white background meets rules like these without you having to think about them.
And it is practical. White paper is cheap, and a white background is the easiest kind to clean up or replace afterwards.
What do I need for a white background setup?
- A large sheet of white paper or thin card. A2 or bigger for small products, a roll for larger ones.
- A table beside a window.
- Tape, and a wall, box or chair back to tape the paper to.
- Two pieces of white foam board or card.
- A phone or camera, and something to hold it steady.
Tape the top edge of the paper to the upright and let it fall in a gentle curve onto the table. Photographers call this a sweep. The curve removes the hard line where a wall meets a table, so the background looks like it goes on forever. Place the product on the flat part, well in front of the curve.
For the camera side of things, follow the settings in how to take product photos with your phone.
How do I light a white background?
With soft light from the side, and as much of it on the background as on the product.
Put the setup next to a window that is not in direct sun. The window lights one side. Stand a white board on the other side, close to the product, to bounce light back and soften the shadow. If the paper behind the product looks darker than the paper in front, prop the second board so it throws light onto the back of the sweep.
The more evenly the paper is lit, the less work there is later. Creases and dirty marks on the paper show up clearly, so use a fresh sheet and keep fingers off it.
Why does my white background look grey or blue?
This is the most common problem, and it is the camera's doing, not yours.
Grey. A camera sets its brightness on the assumption that the average scene is a mid-tone. Point it at a mostly white scene and it darkens everything to compensate, turning white into grey. The fix is to tell it to expose brighter. On a phone, tap the product and drag the brightness slider up until the paper looks white but the product still shows detail.
Blue or yellow. That is white balance. Shade and overcast light lean blue, and indoor bulbs lean orange. Turn off the room lights so there is only one kind of light, and correct what is left when you edit.
Uneven. White at the front and grey at the back means the back of the paper is getting less light. Move the setup closer to the window or add the second bounce board.
How do I make the background pure white when editing?
There are two ways, and which one suits depends on how good the original is.
Brighten what you have. If the paper is evenly lit and nearly white, raise the exposure or the "whites" slider until the background reaches pure white, then pull the "blacks" or contrast back so the product does not wash out. This keeps the natural shadow under the product. It works well when you got the lighting right.
Cut the product out. If the background is patchy, creased or was never white to begin with, the product is separated from the background and placed on a clean one. Phones and many free apps can now do this with a tap. The automatic tools do well on simple shapes and struggle with fine edges: hair, fur, lace, clear glass, and anything with holes in it. Check the edges at full size before you use the result.
Whichever you choose, do it the same way for every product, so the whole store matches.
Should I keep the shadow?
Usually, yes. A product with no shadow at all looks like a sticker floating on the page. A soft shadow underneath tells the eye that the thing is real and sitting on a surface.
If you brightened the original, the natural shadow is still there. If you cut the product out, add a small, soft shadow back beneath it. Keep it subtle and identical across the range.
What about white, clear or shiny products?
These are the hard ones.
- White products on white. The edges vanish. Stand a piece of black or dark grey card just out of frame on each side. It adds a thin dark edge that defines the shape. A very light grey background is also acceptable.
- Glass and clear plastic. They show whatever is around them. Light them from behind or from the side through something translucent, and expect a few attempts.
- Shiny metal and glazed ceramics. They act as mirrors and will reflect the window, the room and you. Surround the product with white card so the reflections are clean, and shoot from a slight angle so you are not in it.
- Jewellery. Small, reflective and detailed all at once. This is where a professional often earns the fee. See DIY vs professional product photography.
Do online marketplaces require a white background?
It depends where you sell, so check each one's current rules. As at the time of writing:
- Google Shopping listings do not allow promotional text, watermarks or borders, and ask that the product fill 75% to 90% of the image.
- Trade Me publishes photo guidelines for its marketplace. The main photo is expected to show the item being sold, without watermarks, logos or marketing text.
- Etsy does not support transparent backgrounds: transparent areas of a PNG show as black. Save cut-out photos with a white background filled in.
- Your own store, whether on Shopify or a custom site, has no rule. Consistency is the only requirement.
Sizes and file types differ too. They are listed in product photo sizes for NZ online stores.
When is a white background not the best choice?
When the product needs a setting to make sense. A garden ornament looks better in a garden. A rug needs a room. Clothing often sells better on a person than laid flat.
The usual answer is both. Use the white background photo as the main image, so the catalogue is consistent, and add one or two photos in a real setting further along. Some brands choose a soft colour in place of white for the whole range, which works as long as every product gets the same one.
What if I already have photos on the wrong background?
You do not have to reshoot. If the product is in focus and reasonably lit, it can be cut out of whatever it was photographed against and placed on a clean background.
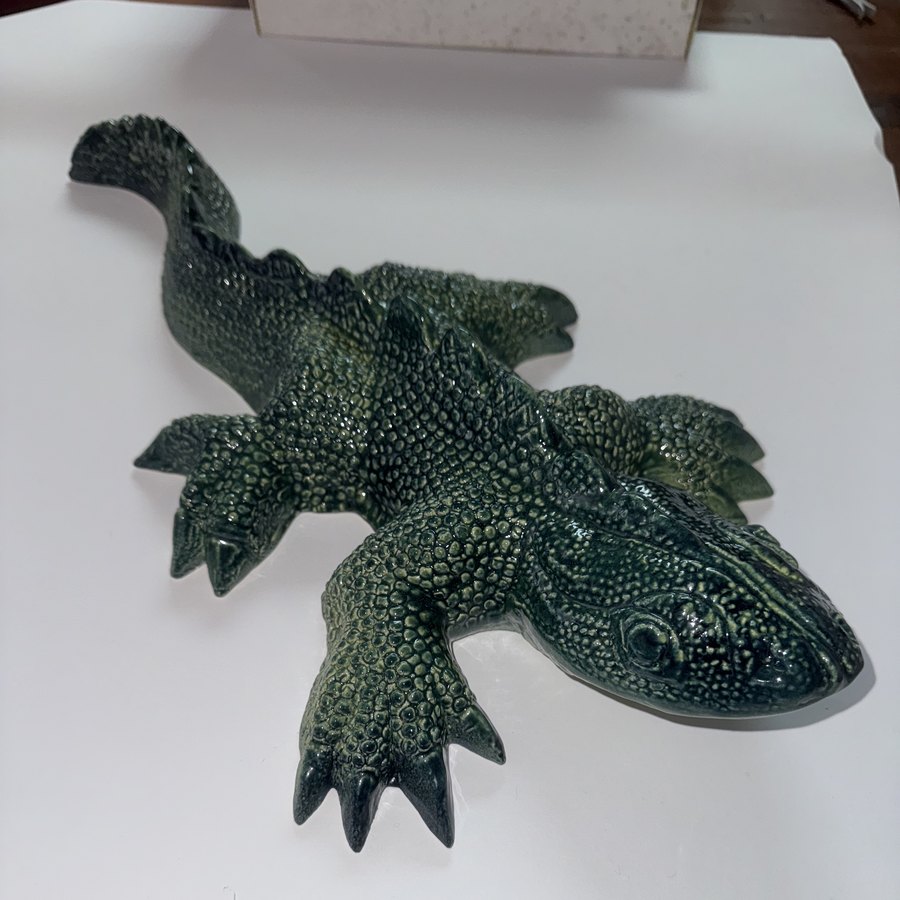
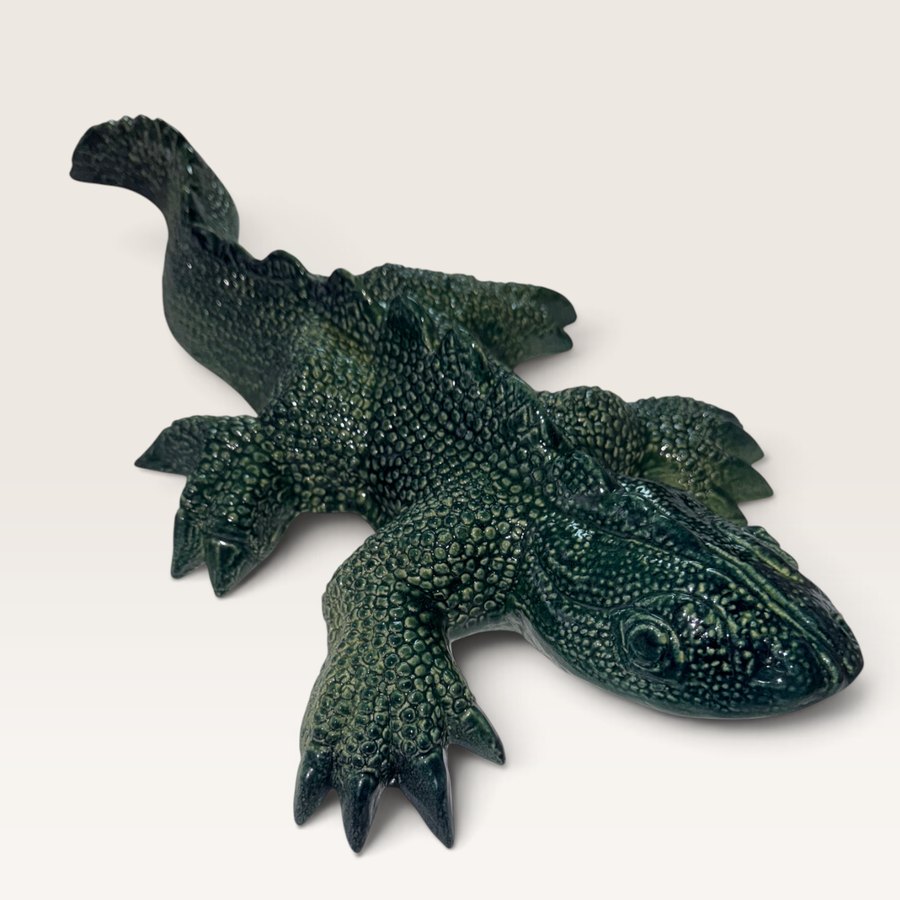
That is the main thing our product photo editing does. Here is one photo, before and after. The background here is a soft cream, not pure white. The method is the same.