Guides / App development
How we trained an on-device AI to track basketball shots
The shot tracker in Hoopium, our basketball app, runs on a model we trained ourselves. Ethan filmed himself shooting, labelled every image by hand, and trained an on-device AI in Google Colab to recognise the ball and the hoop from every angle and tell a make from a miss. There was no ready-made model for that job, so we made one. This is how, including the parts that are still hard.
- Film real footage, label the ball and the rim in every frame, and train an object detection model in Google Colab
- Shrink the model so it runs on the phone itself, with no video leaving the device
- Judging a make or a miss is logic on top of the detections, and depth is still the hard part
Why train your own model?
Because nothing off the shelf knew what a basketball going through a hoop looks like from a phone propped on the ground.
Ready-made models are excellent at general things. Google's ML Kit will find a human body or a face with no training at all, and we use it for exactly that in Boxerium. A basketball rim seen from below, at dusk, with a chain net, is not a general thing. When the thing you need to recognise is specific to your app, you collect your own examples and train on them.
It also had to run on the phone. A shot tracker that uploads video to a server is slow, expensive to run, uses mobile data on a court, and raises obvious privacy questions. On-device means the camera frames never leave the phone.
How does the shot tracker get built, step by step?
- Film. Real shots, on real courts, from the positions a player would actually put a phone.
- Label. Draw a box around the ball and around the rim in every image, and name each box.
- Train. Run the labelled images through training in Google Colab until the model finds the ball and rim on images it has not seen.
- Shrink. Convert the trained model to a small 8-bit TensorFlow Lite file that a phone can run quickly.
- Ship. Put the model in the app, feed it camera frames, and turn its detections into makes and misses.
What did the filming involve?
Ethan filmed himself shooting. That sounds trivial and it is most of the work.
A model only learns what it is shown. If every clip is filmed from the left side at midday, the tracker will fail from the right side in the evening. So the footage has to vary on purpose:
- Different angles and distances from the hoop.
- Different light: bright sun, overcast, evening, indoor.
- Different hoops and backgrounds.
- Makes and misses of every kind: swishes, rim-outs, airballs, shots off the backboard.
- Frames where the ball is partly hidden, blurred, or far away.
The useful instinct is to film the cases you expect to fail. A model trained only on clean examples is confident and wrong.
What does labelling every image mean?
It means opening each image and drawing a rectangle around every object the model should learn, then tagging it: ball, rim. The model learns from those rectangles and nothing else.
Ethan labelled every image himself. It is slow, repetitive work, and it is also where quality is decided. A box drawn loosely teaches the model to be loose. A ball left unlabelled in one frame teaches it that a ball is sometimes background.
There is no shortcut we would recommend for a first model. Later versions can use the current model to suggest labels, which a person then corrects, and that speeds things up a great deal.
Why train in Google Colab?
Training a vision model needs a graphics processor, and a laptop without one will take days. Google Colab is a hosted notebook that runs in a browser and gives access to that kind of hardware without buying it.
For a solo developer that is the whole appeal. Upload the labelled images, run the training, download the result. If the result is poor, the answer is almost always more or better data, not a cleverer setting. Expect to go round the loop more than once: train, test on the court, find where it fails, film those cases, label them, train again.
How does a model get small enough to run on a phone?
By converting it after training. Hoopium's model is an 8-bit TensorFlow Lite file. The numbers inside the trained model are stored at much lower precision, which makes the file smaller and the model faster, at a small cost in accuracy.
The trade is worth it. A phone has to run the model on frame after frame from a live camera while also drawing the screen and staying cool in the sun. A slightly less precise model that keeps up is far more useful than a precise one that lags behind the ball.
How does it tell a make from a miss?
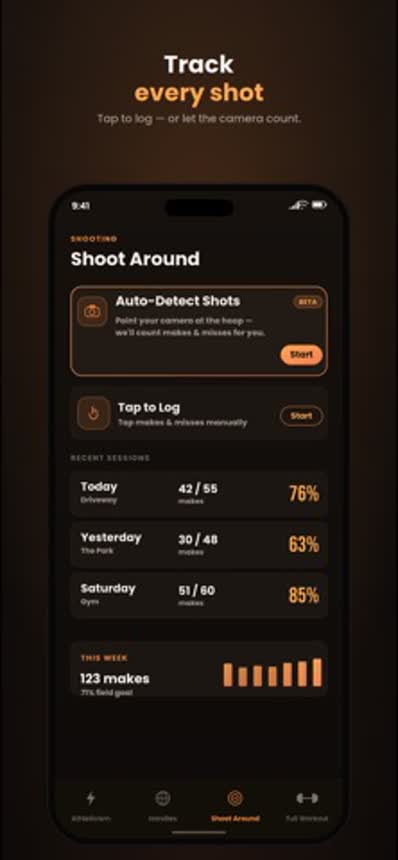
The model itself does not know what a make is. It only answers one question per frame: where is the ball, and where is the rim?
Makes and misses come from ordinary code on top of those answers. In outline: track the ball from frame to frame, notice when it rises towards the rim, and then check whether it passes down through the rim or ends up somewhere else. The app counts the result and works out the shooting percentage.
This split matters for anyone planning an AI feature. The model is the eyes. The rules you write on top are the judgement, and they are much easier to test and fix than the model is.
What is still hard?
Depth. A single phone camera sees a flat picture, so the model knows where the ball is in the image but not how far it is from the lens. That is why measuring a shooter's distance from the hoop is a future goal for Hoopium and not a current feature. On-device AI still struggles with it.
| Works now | Still in progress |
|---|---|
| Counting makes and misses | Measuring distance from the hoop |
| Shooting percentage | Scored shooting workouts |
| Running fully on the phone | Layups, and possibly dunks |
We would rather ship a tracker that does one thing honestly than one that claims five. The rest of what Hoopium does is on the Hoopium page, and the other camera AI we have built is explained in how AI form scoring works.